IT’S DECEMBER! Time to trick myself into thinking I live in a Central Texas Winter Wonderland.
Y’all, I have a problem.
I was desperately trying to find inspirational fall and Halloween crafts to do. I mostly just found myself in the kitchen making and baking yummy foods. However, once Thanksgiving passed, I have been struggling to STOP crafting. I think it’s because of my stubborn vow to make sure COVID doesn’t rid me of my holiday cheer.
In the interest of sharing that cheer, I’ll try to take enough of a break from my crafting and celebrating to give you a few blog posts about what I’m up to. Before I start, I just want to note that I personally celebrate a lot of secular Christmas traditions smattered with some nostalgic Christian Christmas songs and memories. But many of my wonderful friends and family celebrate Hannukah, winter solstice, or other holidays. This is just to say that I recognize my holiday cheer is not one size fits all – and I’d love to see what other celebrations are going on!
Pine Wreaths
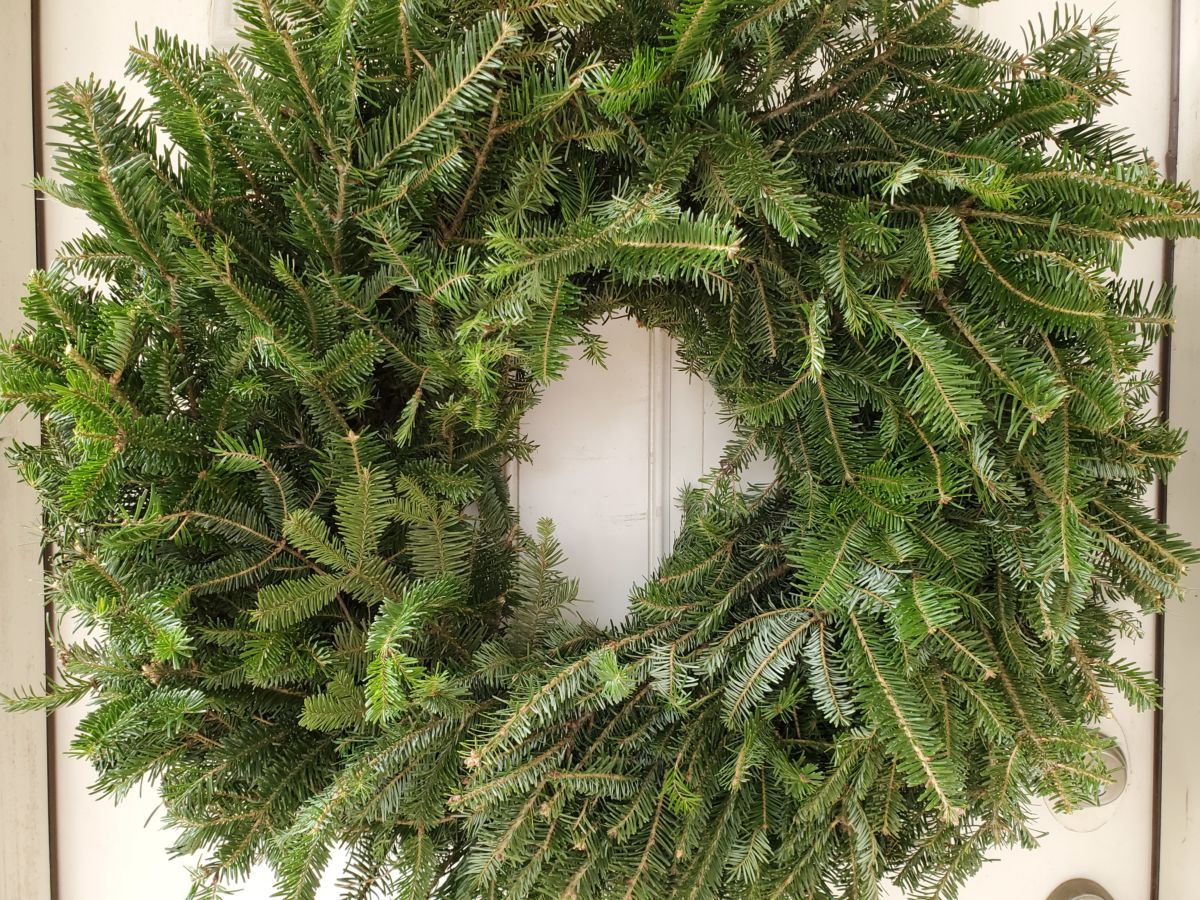
Nothing says Winter Wonderland and Christmas to me like the smell and look of pine trees. Needless to say, a wreath was high on the list of projects for this year.
Early on in life, my mom picked up on a trait of mine that was relevant for this craft: I tend to take a project and learn it just well enough to sort of figure it out in my own way. Sometimes this gets me into trouble. It’s smart to learn to do something the right way first, mastering the fundamentals, and then riff off of that to make it your own. Sometimes it takes me longer to get a basic project figured out because I try to adapt it before fully grasping it. On the bright side, I am able to be a bit more financially and environmentally frugal because I can adjust a project to fit the materials I have without buying something special just to use once or twice.
Fortunately, my riffing worked well for my first ever pine wreath! I’ve made one or two branch wreaths and fake vine wreaths, but this was the first time making one of the wonderfully pine-scented versions. I had a friend give me a few pointers in addition to looking up instructions online – and it turned out great!
What I riffed off of: https://www.littleyellowwheelbarrow.com/free-diy-wreaths-holidays/
What I did:
- I got free pine tree trimmings from the place we bought our Christmas tree. They emphatically told me to take as much as I wanted. My understanding is most places are eager to get rid of the trimmings, so no cost – yippee!
- Cut the trimmings into smaller, more evenly sized pieces. I cut mine into pieces that split in 3-5 directions. (As you can see from the picture, I needed a bit of space to spread everything out.)
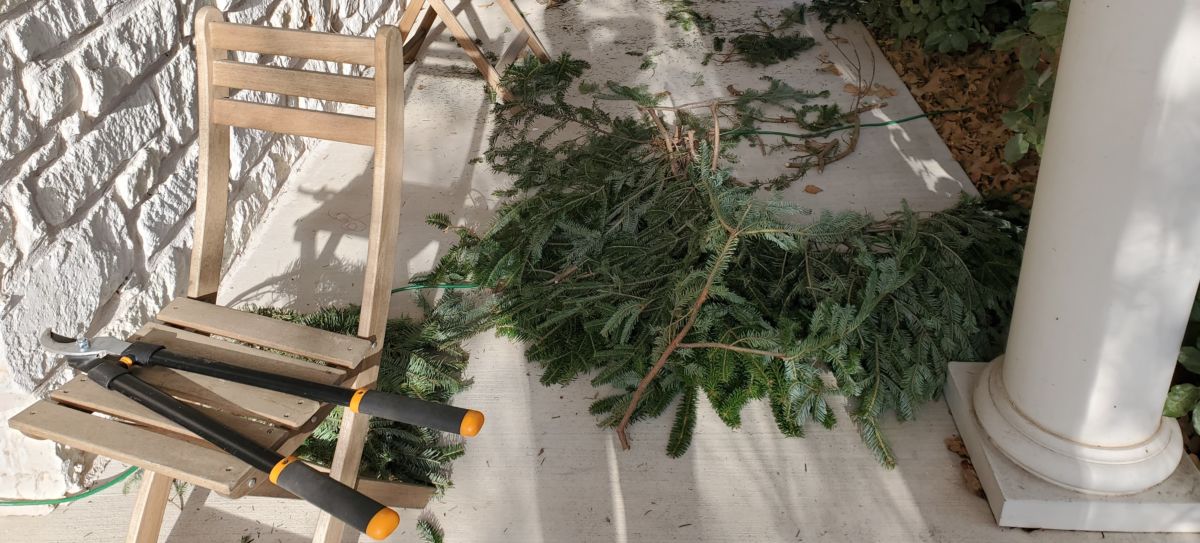
- I started by overlapping 2/3 to 3/4 of Trimming B onto Trimming A, angling it so it would eventually be a circle. I then cut the needed length of wire and twisted the wire around the firmest part of the overlapping trimmings. Then I overlapped Trimming C onto Trimming B and so on. After a while, I got the hang of it to the point that I’d add a few trimmings before adding a wire that connected 3-4 trimmings at one time.
- A few people have asked how I got my wreath so full and – well – monstrous. The answer? Dumb luck. As I thought I was getting near the end, I found the connections between a number of trimmings to be flimsy and the form was a bit awkward in shape and visually underwhelming, so I ended up creating a smaller, more compact wreath by overlapping it onto itself. This ended up making my wreath much more solid and substantial.
- I added more, smaller trimmings where I needed (1) to even out the wreath and (2) to wedge into the wire bindings where any trimmings were still a bit loose.
- I ran out of wire just as I finished the wreath. Only problem? The monstrosity that it was, I was not convinced my wreath would hold its shape over time, especially once I lifted it up to hang on a door. Womp womp. Fortunately, I had plenty of twine for gardening. I flipped the wreath over and wrapped the twine tightly around all of the foundational twigs/branches until I had gone fully around the wreath. This actually worked really well!
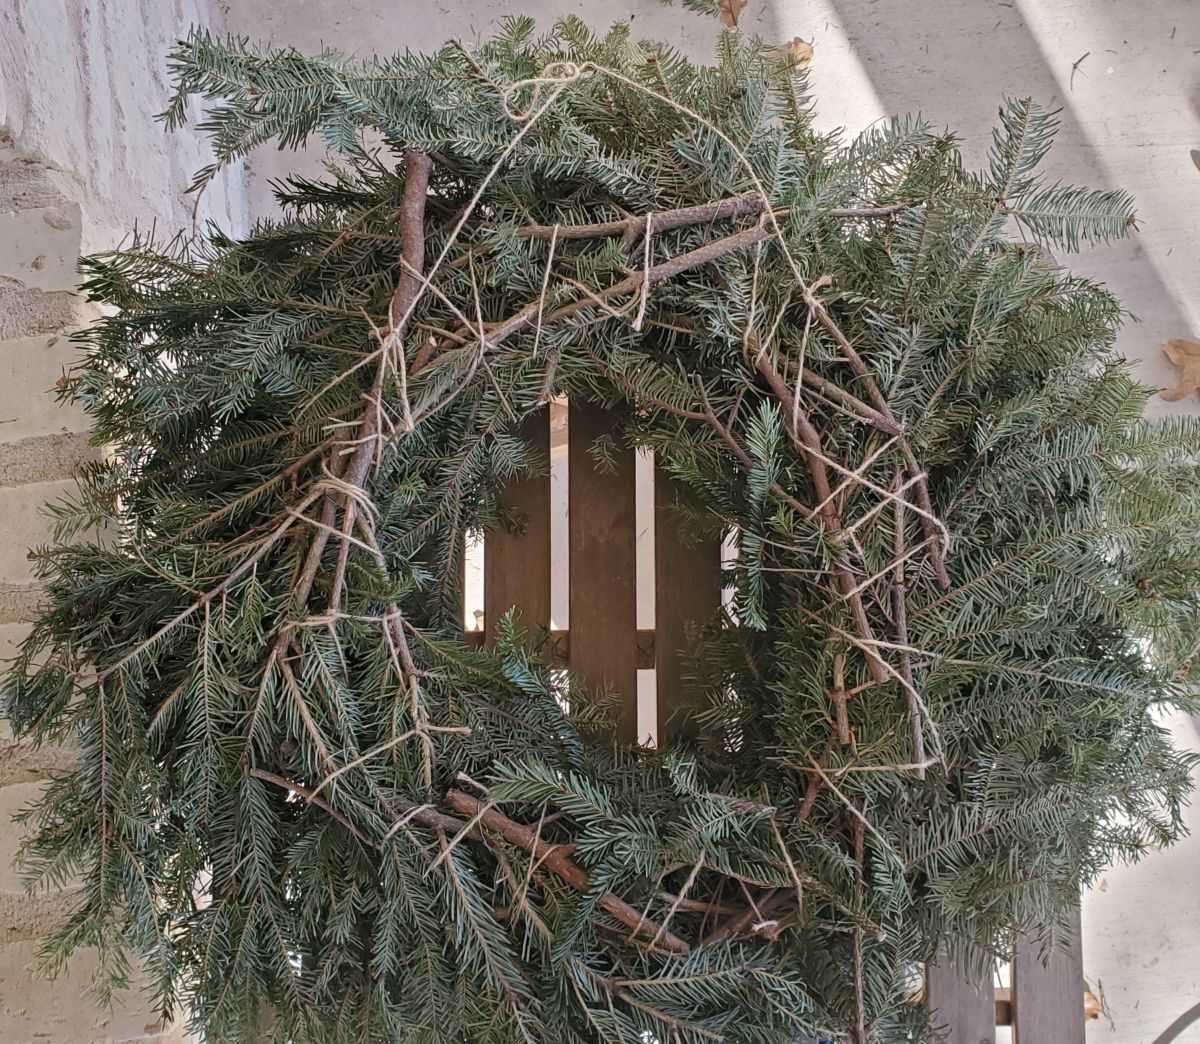
- I flipped the wreath back around, held it up, and rotated it until I found my preferred “top”. Then I cut another strand of twine and tied it to the back so it would hang like a picture frame.
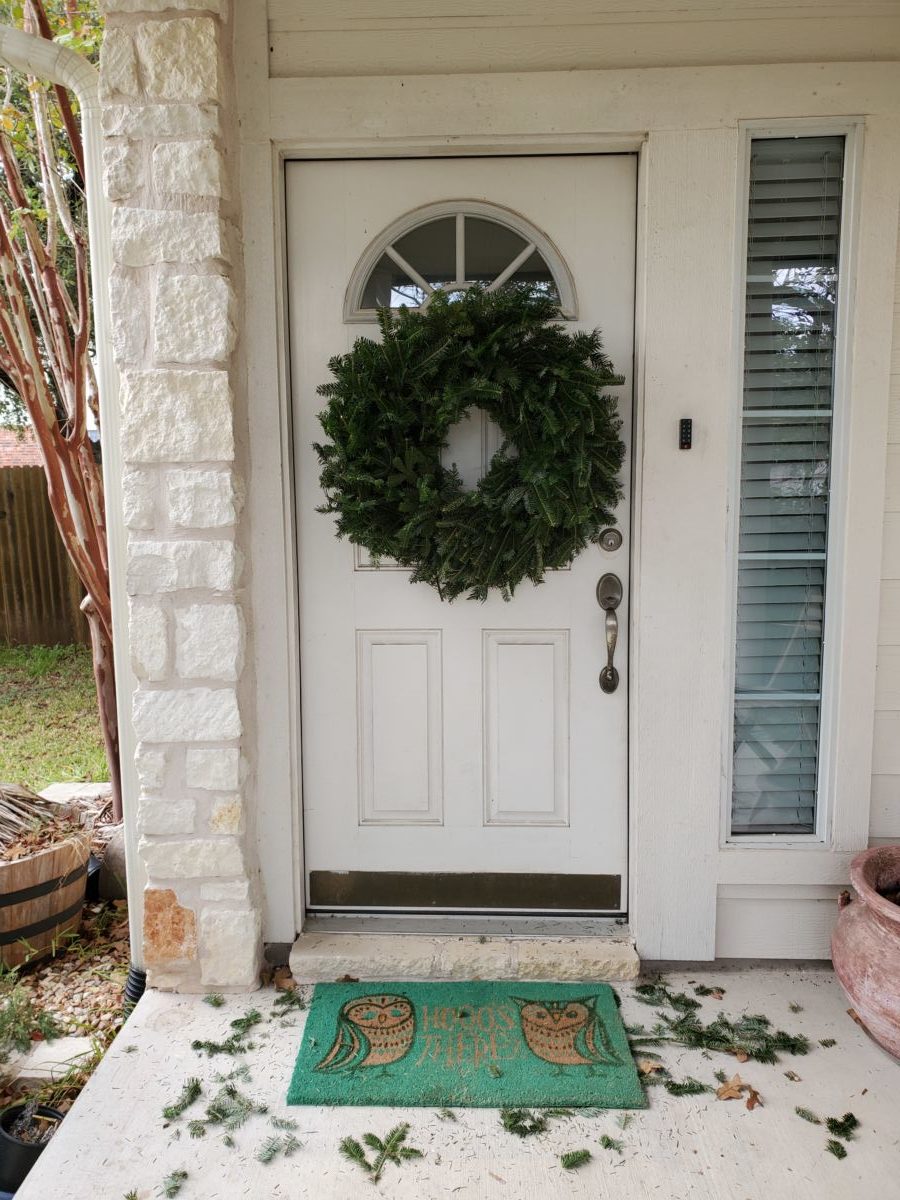
- I hung it on the door and pruned it in a few places to balance out the shape – and voila! Wreath.
I will say this. Do not question the price of wreaths. Those bitches take time and skill! If you have the patience for it, it does feel really good to get to the final product. And you get to smell all piney fresh the rest of the day. If not, I hear ya – just buy one of those beauties from someone local.
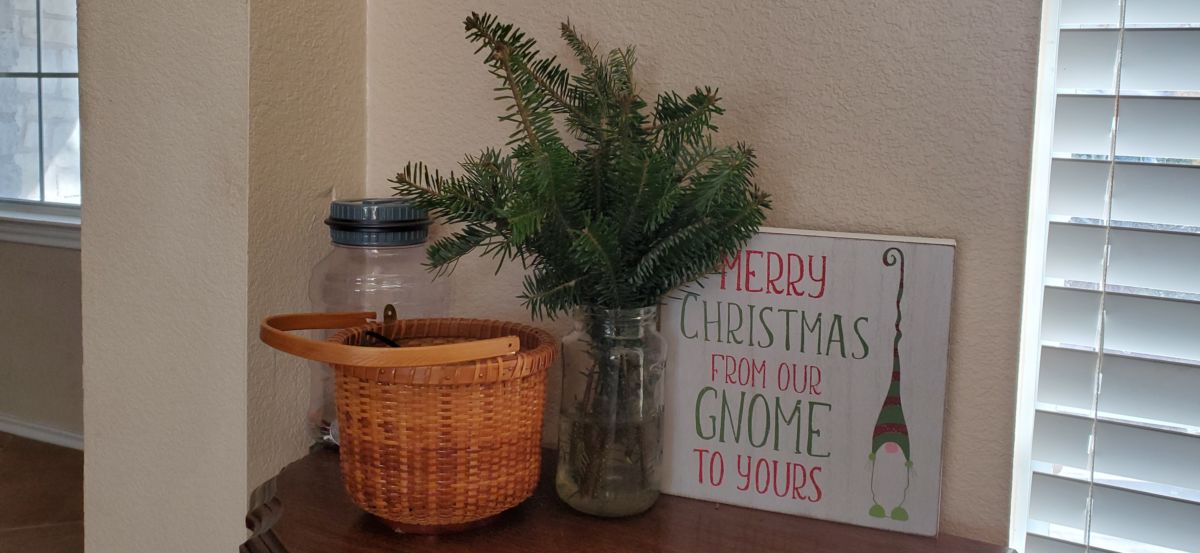
One random tidbit to round out this post. I took the rest of the little cut trimmings and put them in jars and vases of water around the house. A nice way to get as much of that wintry scent and feel as you can. (This would be a great way to go if you don’t have the patience for building a wreath.) Happy wreathing!