Final Christmas post! Man – I am WORN OUT from holiday baking and crafting. Does anyone else get exhausted just from being themselves? I’m sure there’s some life-altering epiphanies I could have about that, but we’ll save those for the new year. 

Anyway, this is a craft I worked on for about a yearIt is another example of not being able to find what I wanted, so I made it myself. I call it my nerd advent calendar. I am very proud of this thing, so I’m just gonna post a bunch of pictures of it. Hopefully, others find it fun, too! 

Basic Layout 

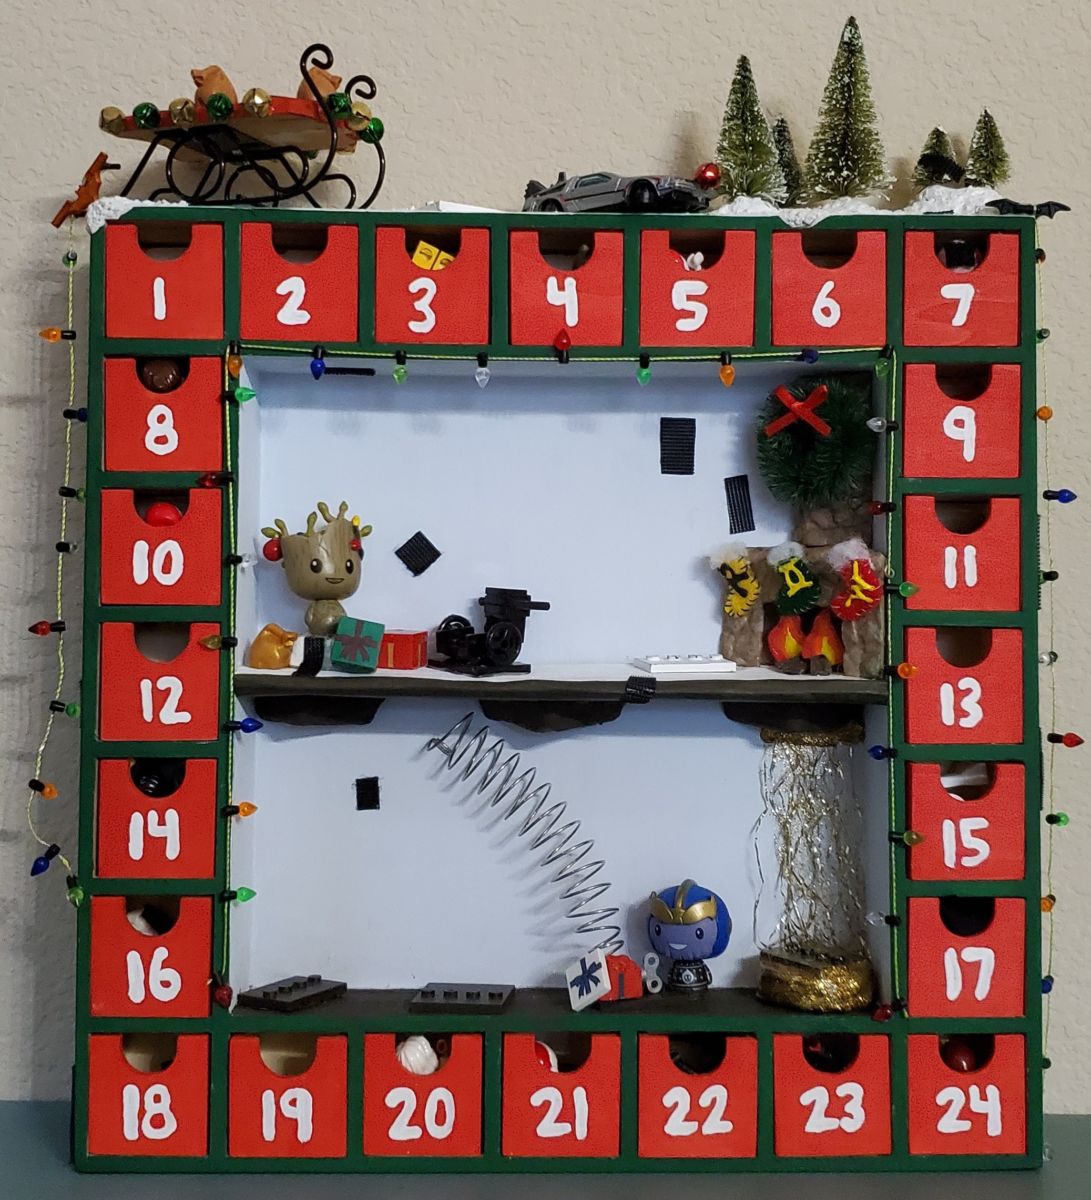
First, I have the basic layout for the start of December. After that you can see the end result you get on Christmas Eve. I actually have one more removable item I need to come up with, but 23 out of 24 done ain’t bad! 

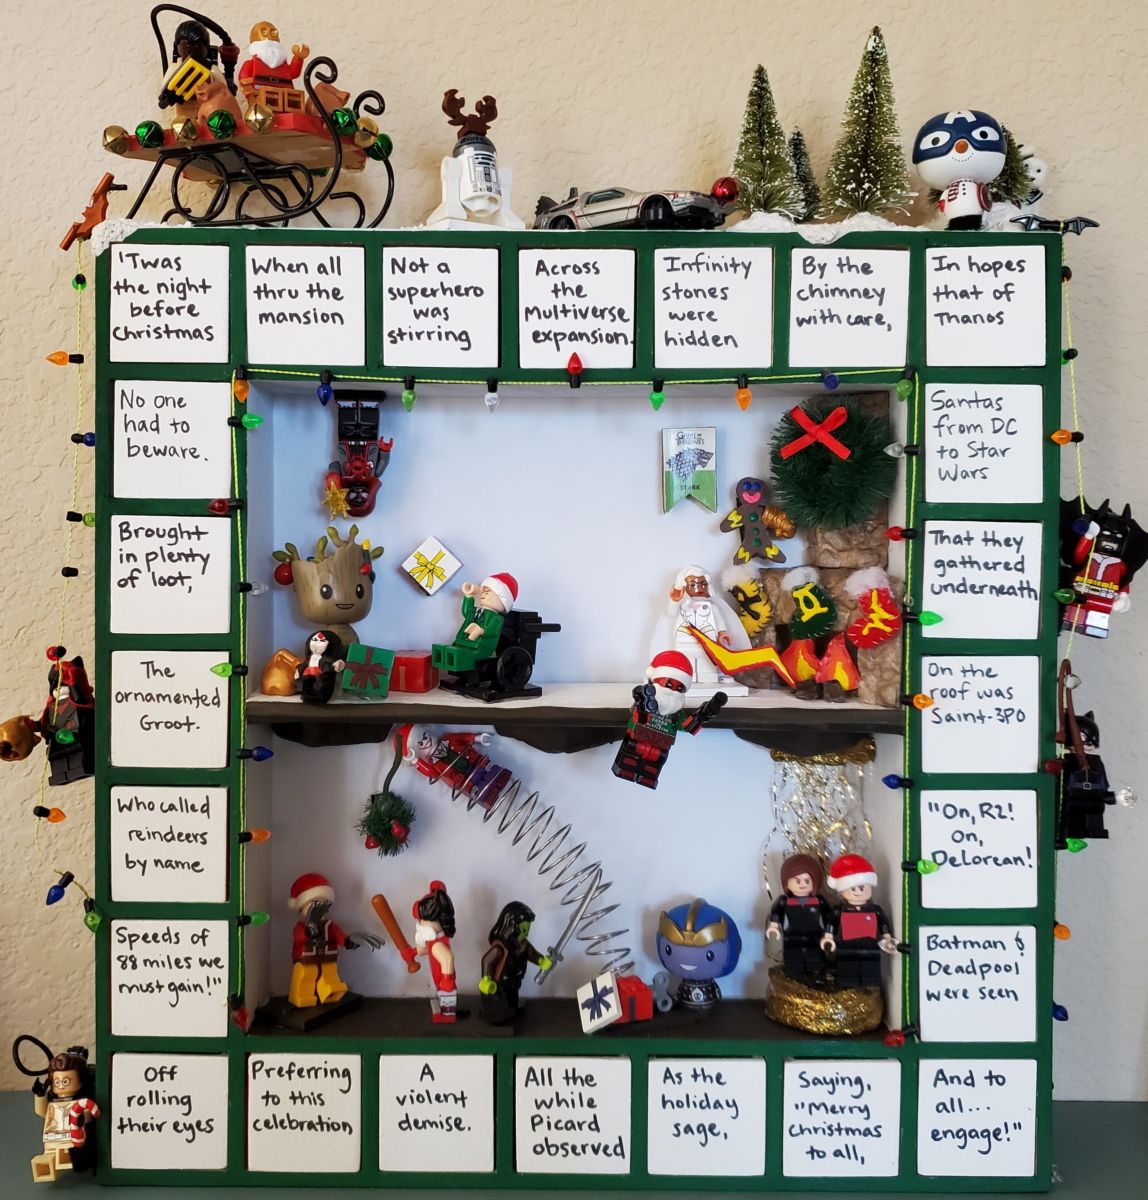
In case it’s easier to read this way, I have typed out the poem: 

‘Twas the night before Christmas 

When all through the mansion 

Not a superhero was stirring 

Across the multiverse expansion. 


Infinity stones were hidden 

By the chimney with care, 

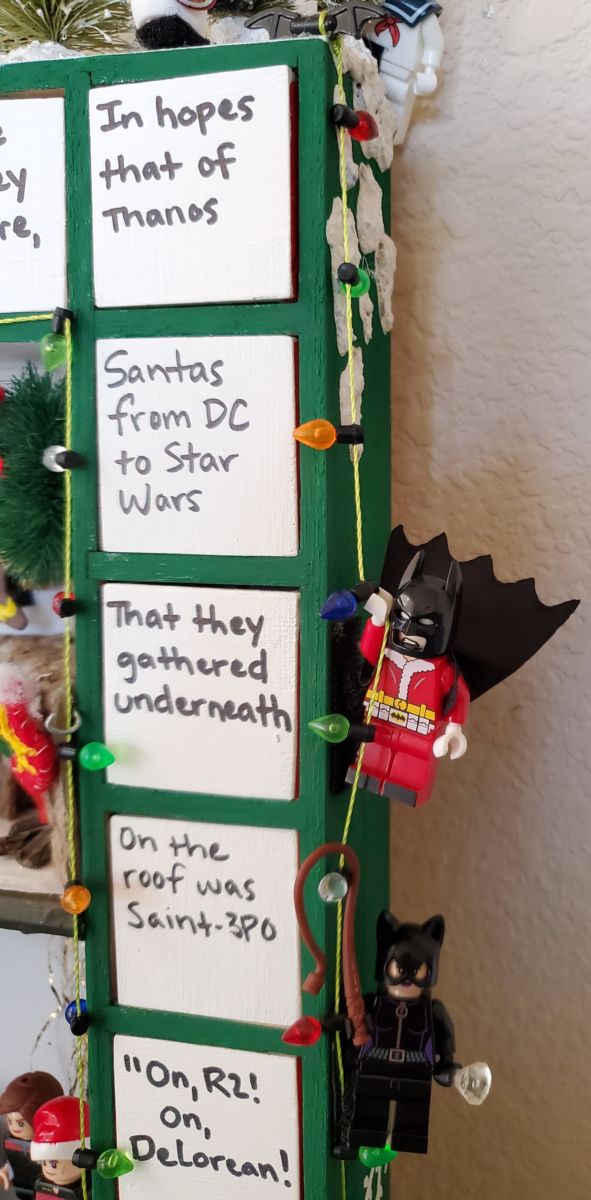
In hopes that of Thanos 

No one had to beware. 


Santas from DC to Star Wars 

Brought in plenty of loot, 

That they gathered underneath 

The ornamented Groot. 


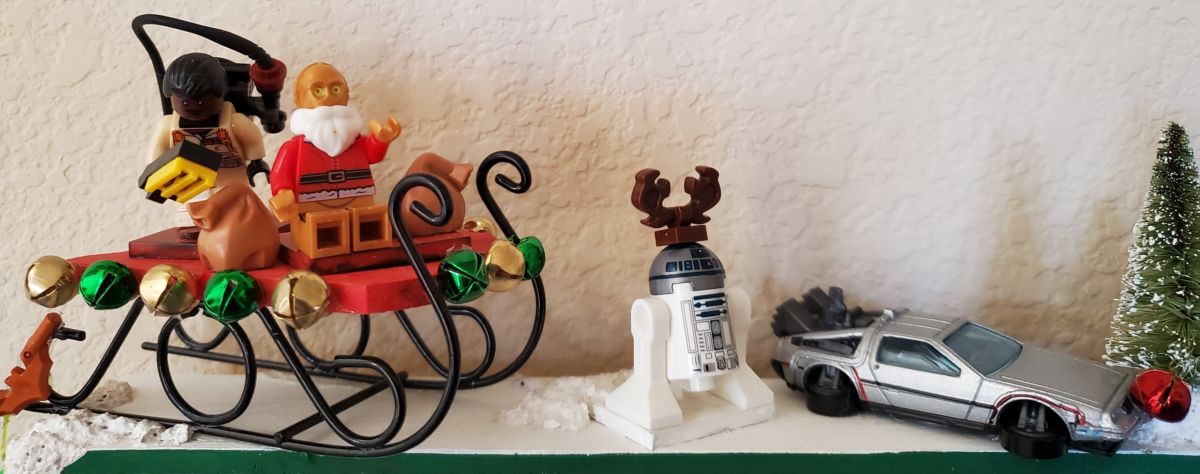
On the roof was Saint-3PO 

Who called reindeers by name, 

“On, R2! On, DeLorean! 

Speeds of 88 miles we must gain!” 


Batman and Deadpool were seen 

Off rolling their eyes 

Preferring to this celebration 

A violent demise. 


All the while Picard observed 

As the holiday sage, 

Saying, “Merry Christmas to all, 

And to all…engage!” 


Top Row: 

  • Ghostbuster Winston scanning presents for ghosts 
  • C3PO riding in his Saint-3PO sleigh 
  • Reindeer R2D2 
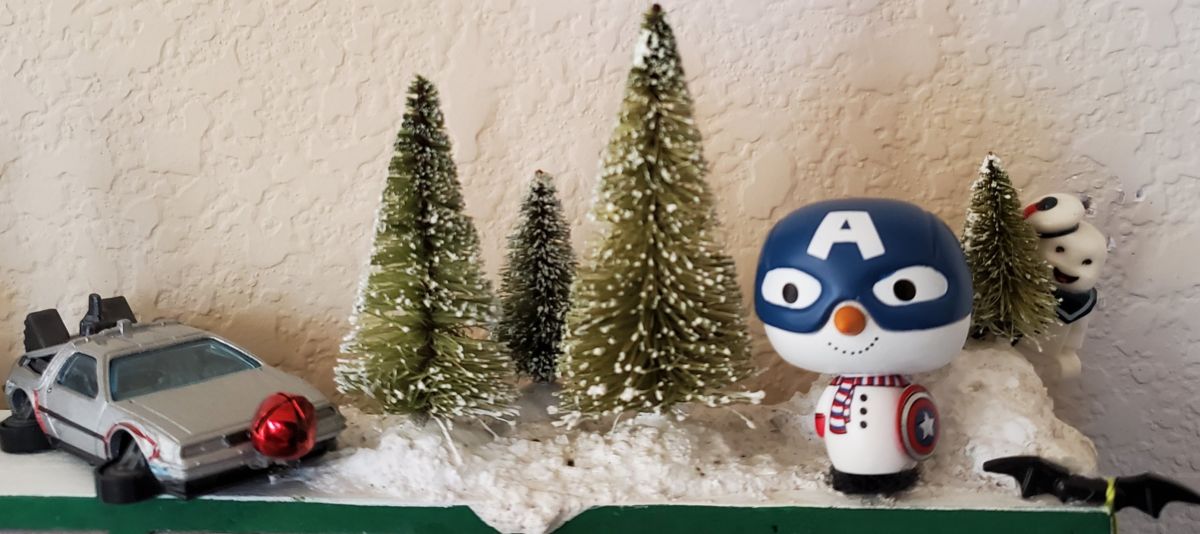
  • Back to the Future DeLorean as Rudolph 
  • Snowman Captain America 
  • Stay Puft Marshmallow Man hiding behind some trees 
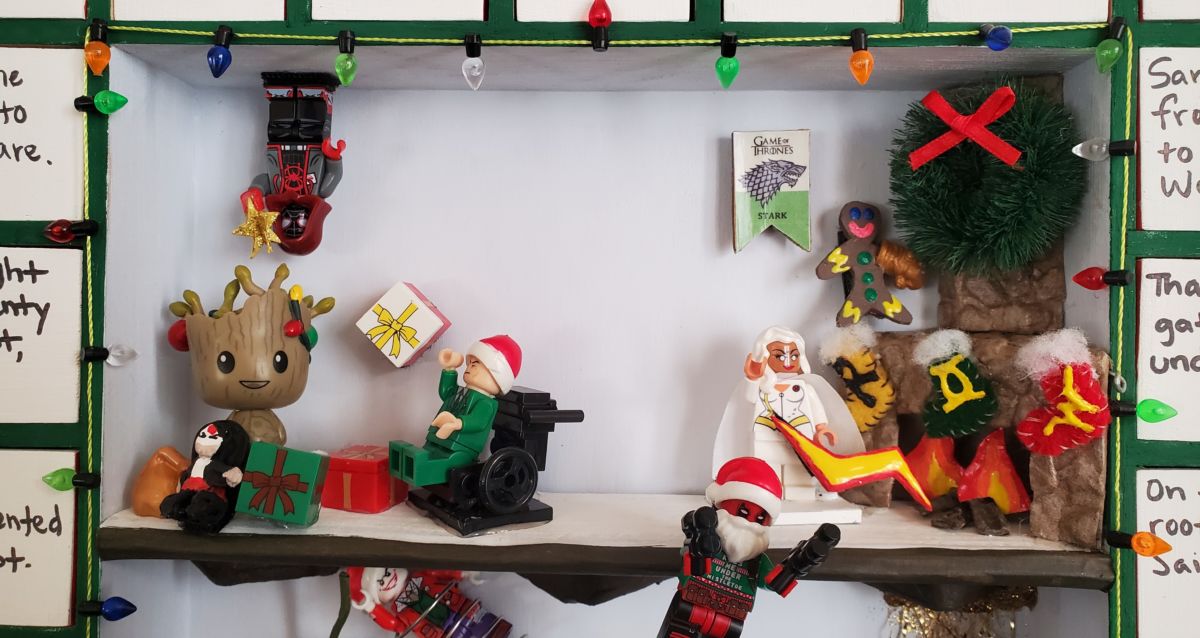
Middle Row: 

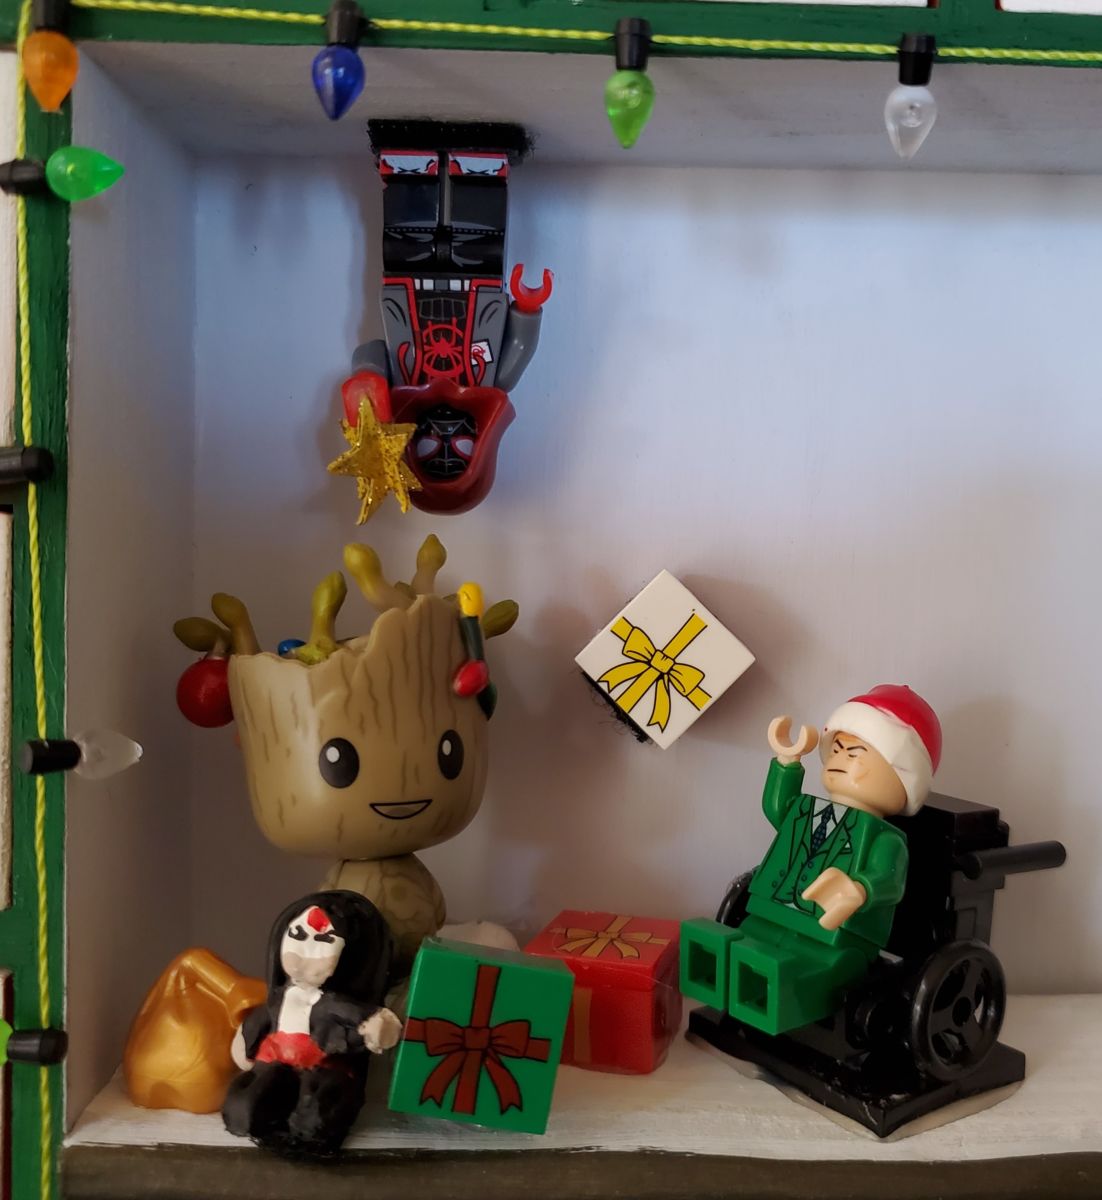
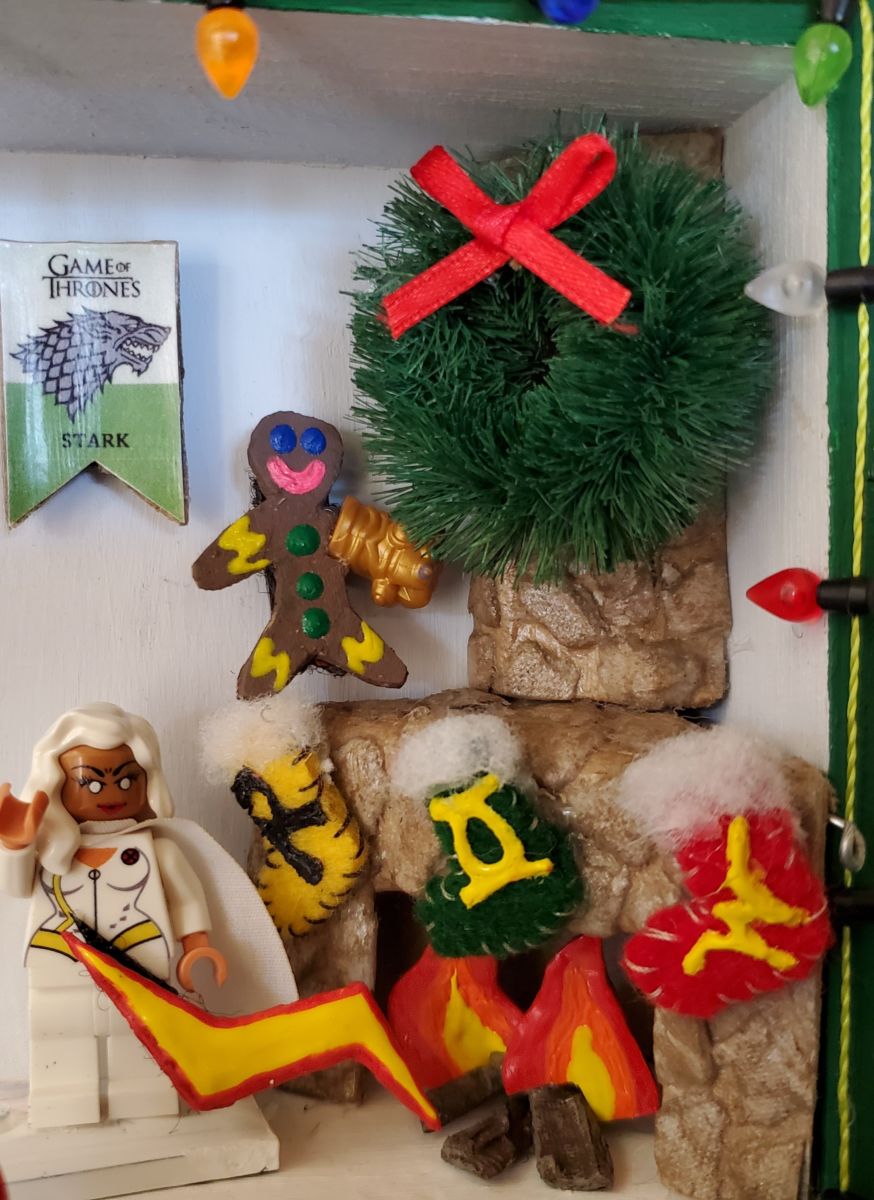
  • Groot ornamented like a Christmas tree 
  • Presents including a Katana stuffed animal 
  • Spiderman placing the star over Groot 
  • Professor X using his psychokinetic powers to place his present under Groot 
  • Stark banner from Game of Thrones 
  • Storm lighting up the fireplace 
  • Robin, Green Lantern, and Wonder Woman’s stockings 
  • A gingerbread man wearing Thanos’ infinity gauntlet 
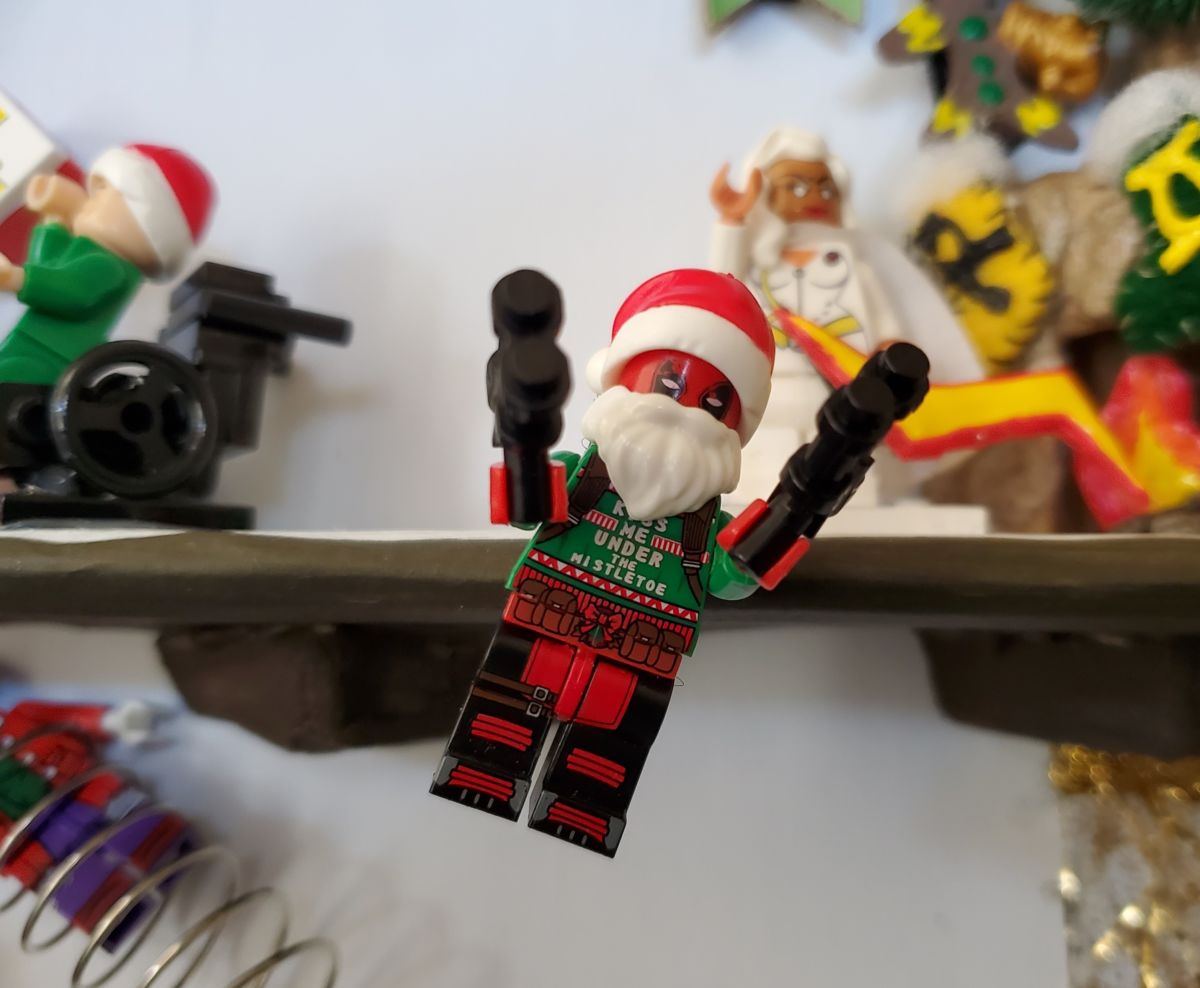
  • Deadpool breaking the 4th wall 
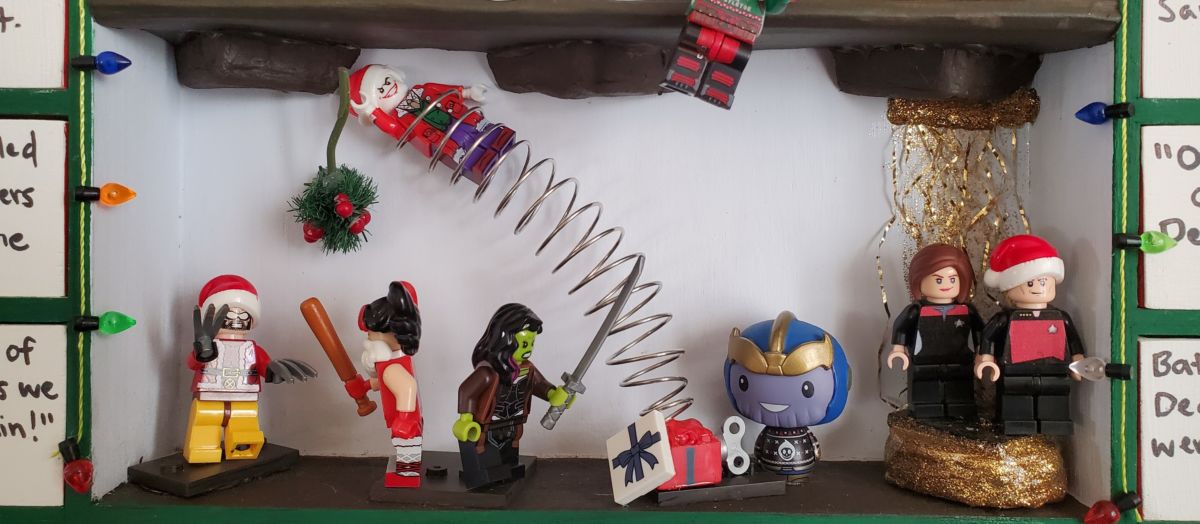
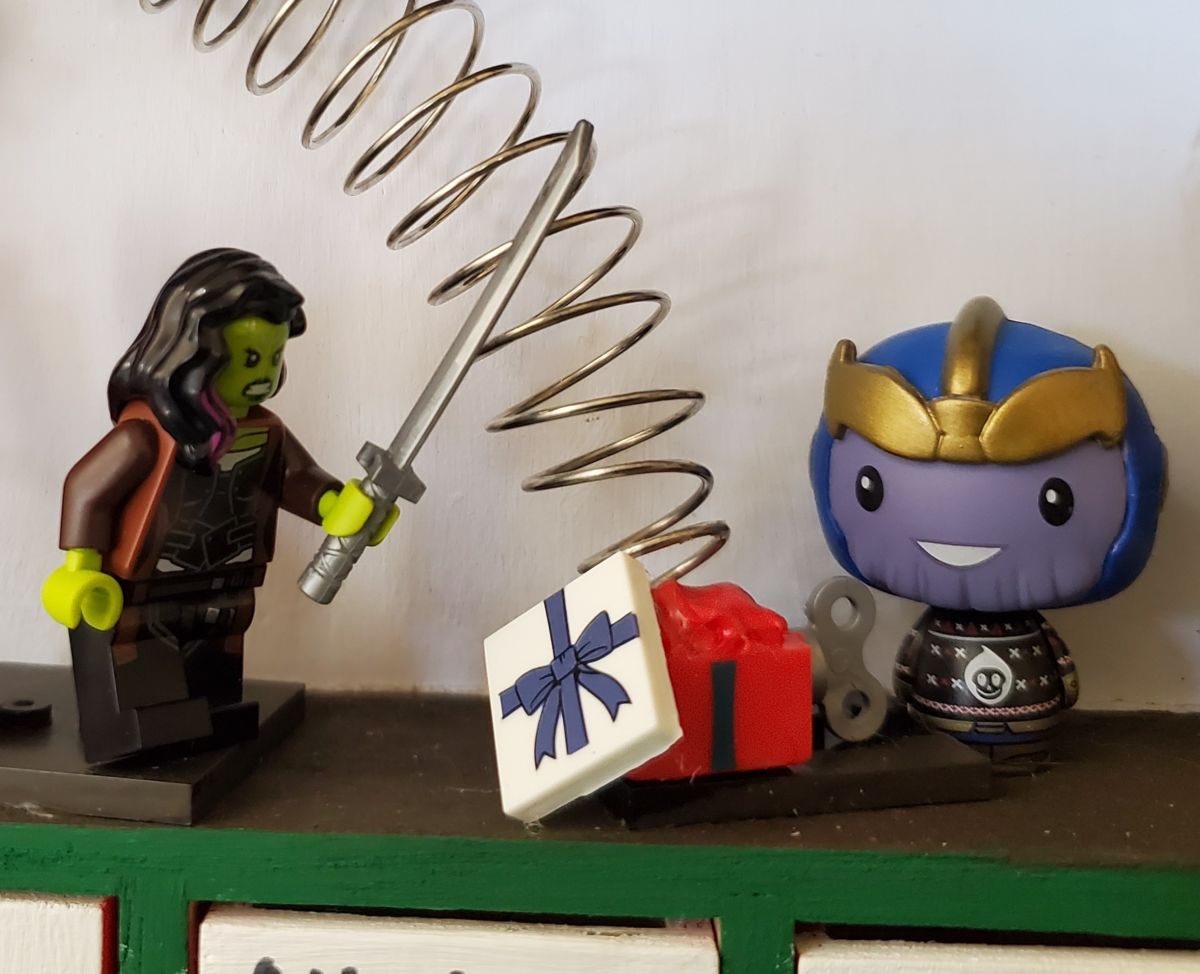
Bottom Row: 

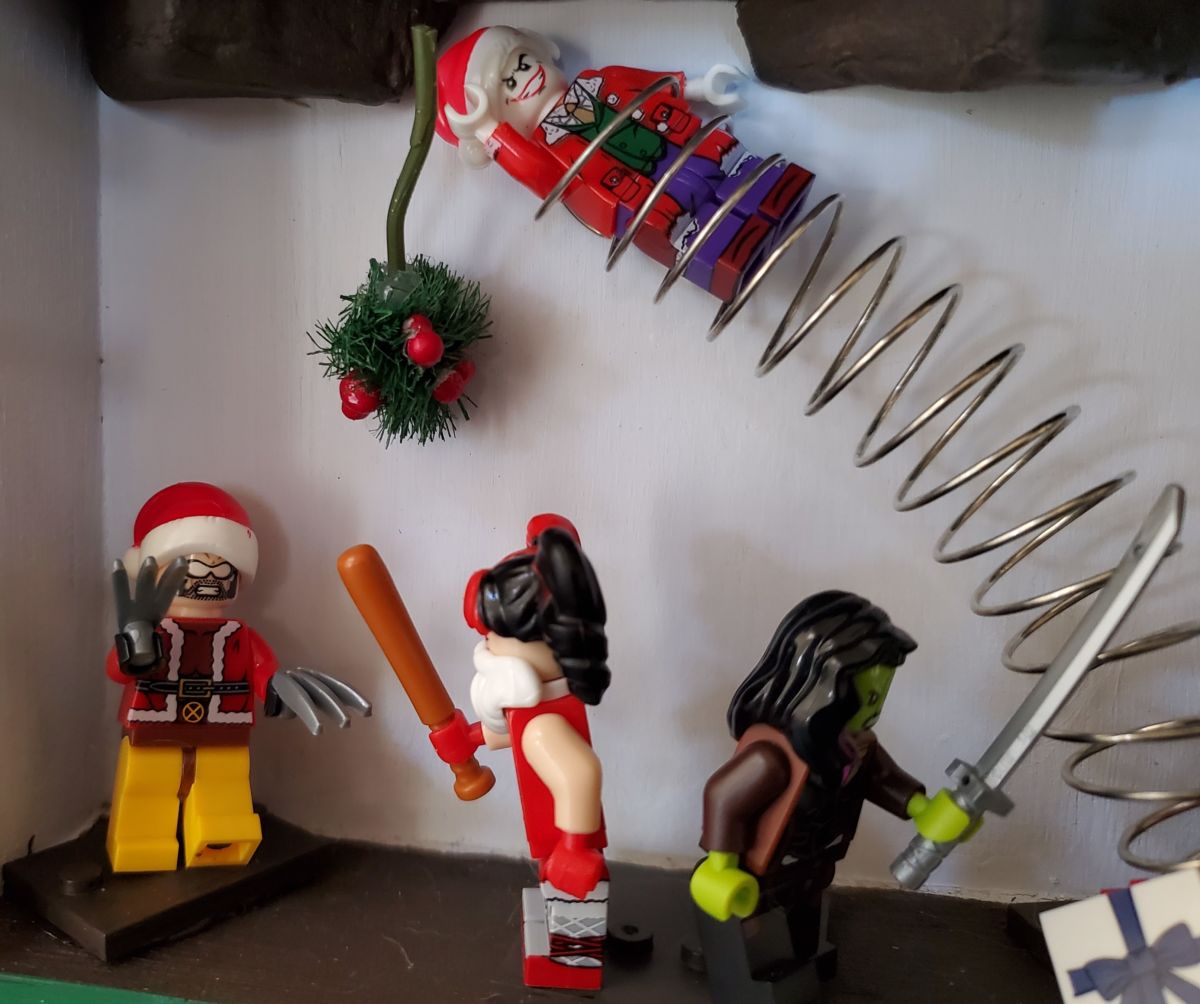
  • Wolverine defending himself against… 
  • Harley Quinn while standing underneath… 
  • Mistletoe being hung by… 
  • The Joker who is springing from a gift box trap set by… 
  • Thanos 
  • Gamora trying to stop Thanos 
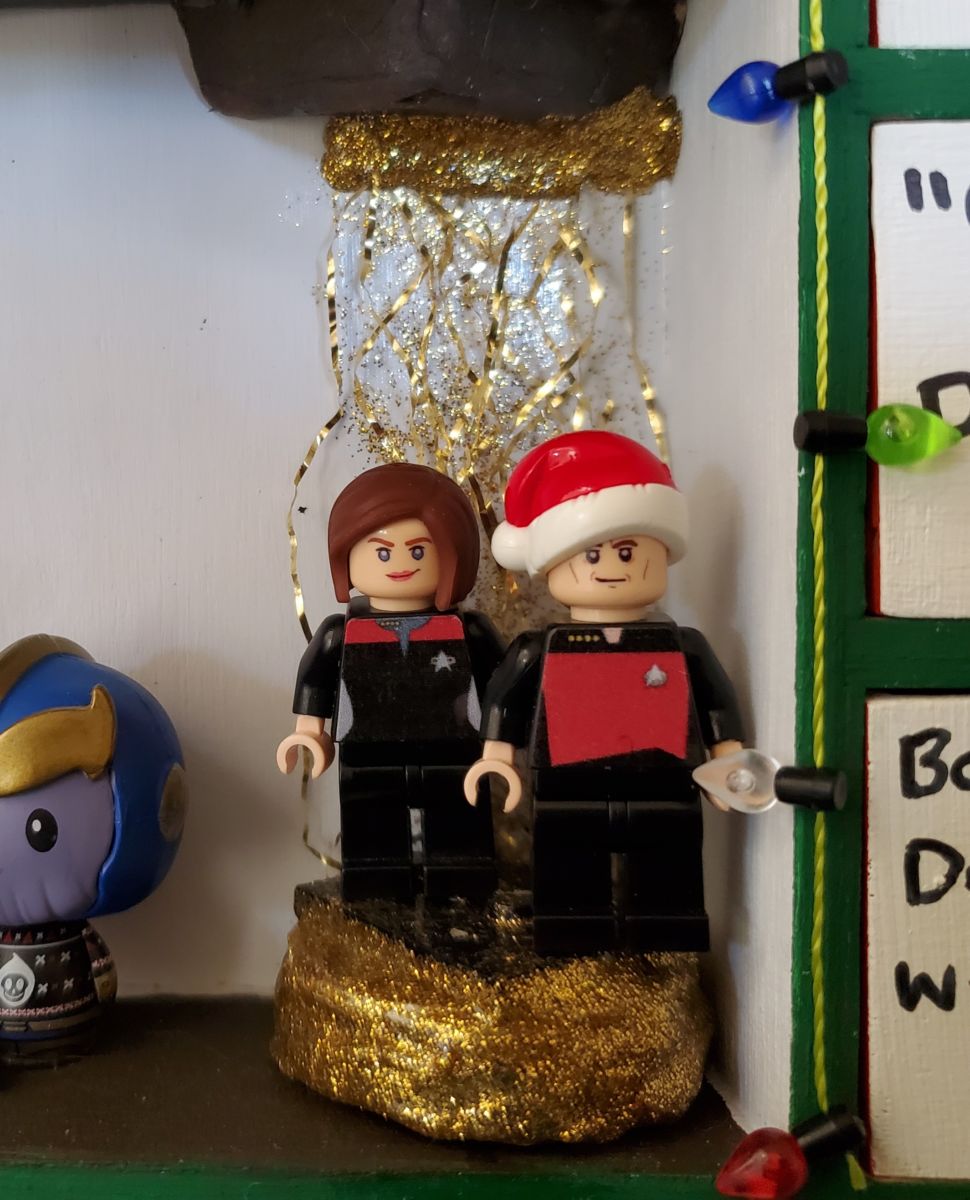
  • Captain Janeway and… 
  • Captain Picard beaming down to observe 21st century Christmas traditions 

Sides: 

  • Santa Batwoman rappelling with Christmas gifts 
  • Ghostbuster Egon enjoying a candy cane 
  • Santa Batman rappelling 
  • Catwoman hitching a ride with Batman 

And that’s all, folks! Now if you’ll excuse me, I’m off to go pretend that it’s socially acceptable to leave all my Christmas decorations up until February. 


IT’S DECEMBER! Time to trick myself into thinking I live in a Central Texas Winter Wonderland.  

Y’all, I have a problem.

I was desperately trying to find inspirational fall and Halloween crafts to do. I mostly just found myself in the kitchen making and baking yummy foods. However, once Thanksgiving passed, I have been struggling to STOP crafting. I think it’s because of my stubborn vow to make sure COVID doesn’t rid me of my holiday cheer. 

In the interest of sharing that cheer, I’ll try to take enough of a break from my crafting and celebrating to give you a few blog posts about what I’m up to. Before I start, I just want to note that I personally celebrate a lot of secular Christmas traditions smattered with some nostalgic Christian Christmas songs and memories. But many of my wonderful friends and family celebrate Hannukah, winter solstice, or other holidays. This is just to say that I recognize my holiday cheer is not one size fits all – and I’d love to see what other celebrations are going on! 

Pine Wreaths 

Nothing says Winter Wonderland and Christmas to me like the smell and look of pine trees. Needless to say, a wreath was high on the list of projects for this year. 

Early on in life, my mom picked up on a trait of mine that was relevant for this craft: I tend to take a project and learn it just well enough to sort of figure it out in my own way. Sometimes this gets me into trouble. It’s smart to learn to do something the right way firstmastering the fundamentals, and then riff off of that to make it your own. Sometimes it takes me longer to get a basic project figured out because I try to adapt it before fully grasping it. On the bright side, I am able to be a bit more financially and environmentally frugal because I can adjust a project to fit the materials I have without buying something special just to use once or twice. 

Fortunately, my riffing worked well for my first ever pine wreath! I’ve made one or two branch wreaths and fake vine wreaths, but this was the first time making one of the wonderfully pine-scented versions. I had a friend give me a few pointers in addition to looking up instructions online – and it turned out great! 

What I riffed off of: https://www.littleyellowwheelbarrow.com/free-diy-wreaths-holidays/  

What I did:  

  1. I got free pine tree trimmings from the place we bought our Christmas tree. They emphatically told me to take as much as I wanted. My understanding is most places are eager to get rid of the trimmings, so no cost – yippee!  
  2. Cut the trimmings into smaller, more evenly sized piecescut mine into pieces that split in 3-5 directions. (As you can see from the picture, I needed a bit of space to spread everything out.)

  1. I started by overlapping 2/3 to 3/4 of Trimming onto Trimming A, angling it so it would eventually be a circle. I then cut the needed length of wire and twisted the wire around the firmest part of the overlapping trimmings. Then I overlapped Trimming C onto Trimming B and so on. After a while, I got the hang of it to the point that I’d add a few trimmings before adding a wire that connected 3-4 trimmings at one time. 
  2. A few people have asked how I got my wreath so full and – well – monstrous. The answer? Dumb luck. As I thought I was getting near the end, I found the connections between a number of trimmings to be flimsy and the form was a bit awkward in shape and visually underwhelming, so I ended up creating a smaller, more compact wreath by overlapping it onto itself. This ended up making my wreath much more solid and substantial. 
  3. I added more, smaller trimmings where needed (1) to even out the wreath and (2) to wedge into the wire bindings where any trimmings were still a bit loose. 
  4. I ran out of wire just as I finished the wreath. Only problem? The monstrosity that it was, I was not convinced my wreath would hold its shape over time, especially once I lifted it up to hang on a door. Womp wompFortunately, I had plenty of twine for gardening. I flipped the wreath over and wrapped the twine tightly around all of the foundational twigs/branches until I had gone fully around the wreath. This actually worked really well! 

  1. flipped the wreath back around, held it up, and rotated it until I found my preferred “top”. Then I cut another strand of twine and tied it to the back so it would hang like a picture frame.  
  1. I hung it on the door and pruned it in a few places to balance out the shape – and voila! Wreath. 

I will say this. Do not question the price of wreaths. Those bitches take time and skill! If you have the patience for it, it does feel really good to get to the final product. And you get to smell all piney fresh the rest of the day. If not, I hear ya – just buy one of those beauties from someone local. 

One random tidbit to round out this post. I took the rest of the little cut trimmings and put them in jars and vases of water around the house. A nice way to get as much of that wintry scent and feel as you can. (This would be a great way to go if you don’t have the patience for building a wreath.) Happy wreathing!